# Using Amazon Web Services Secrets Manager in connections
Video guide: Set up connections safely with AWS Secrets Manager
In this guide, we'll show you how to use secrets from your Amazon Web Services (AWS) Secrets Manager vault to configure Workato connections.
# Prerequisites
To complete the steps in this guide, you'll need:
The following in Workato:
- An account with a successful AWS Secrets Manager workspace-level or AWS Secrets Manager project-level connection
- A user role with Create and Edit Connections privileges
In Amazon Web Services (AWS):
- An existing secret. Refer to Amazon's documentation (opens new window) for info on creating a secret.
- Permissions that allow you to view secrets in AWS Secrets Manager
# Step 1: Retrieve the secret's details from AWS
Sign in to your AWS Management Console and open the Secrets Manager console (opens new window).
In the navigation pane, click Secrets.
Click the secret you plan to use in Workato.
In the Secret details section, locate the Secret name and Secret ARN:

Keep this page open - you'll need it to complete the next step.
# Step 2: Configure a Workato connection
In your Workato account, create a new connection or open the configuration page for an existing connection.
Secrets for Workato connection credentials should follow this syntax:
{{workato:sm:<key name>:<secret ARN>}}
<key name>The
<key name>refers to the specific key name within a secret, not the secret name itself. For example, in a secret namedjira, there may be a key/value pair whereprod.jira.secret.keyis the key name, and its value is the actual personal access token.<secret ARN>The
<secret ARN>is the Amazon Resource Name (ARN) for the secret in AWS Secrets Manager. For example:
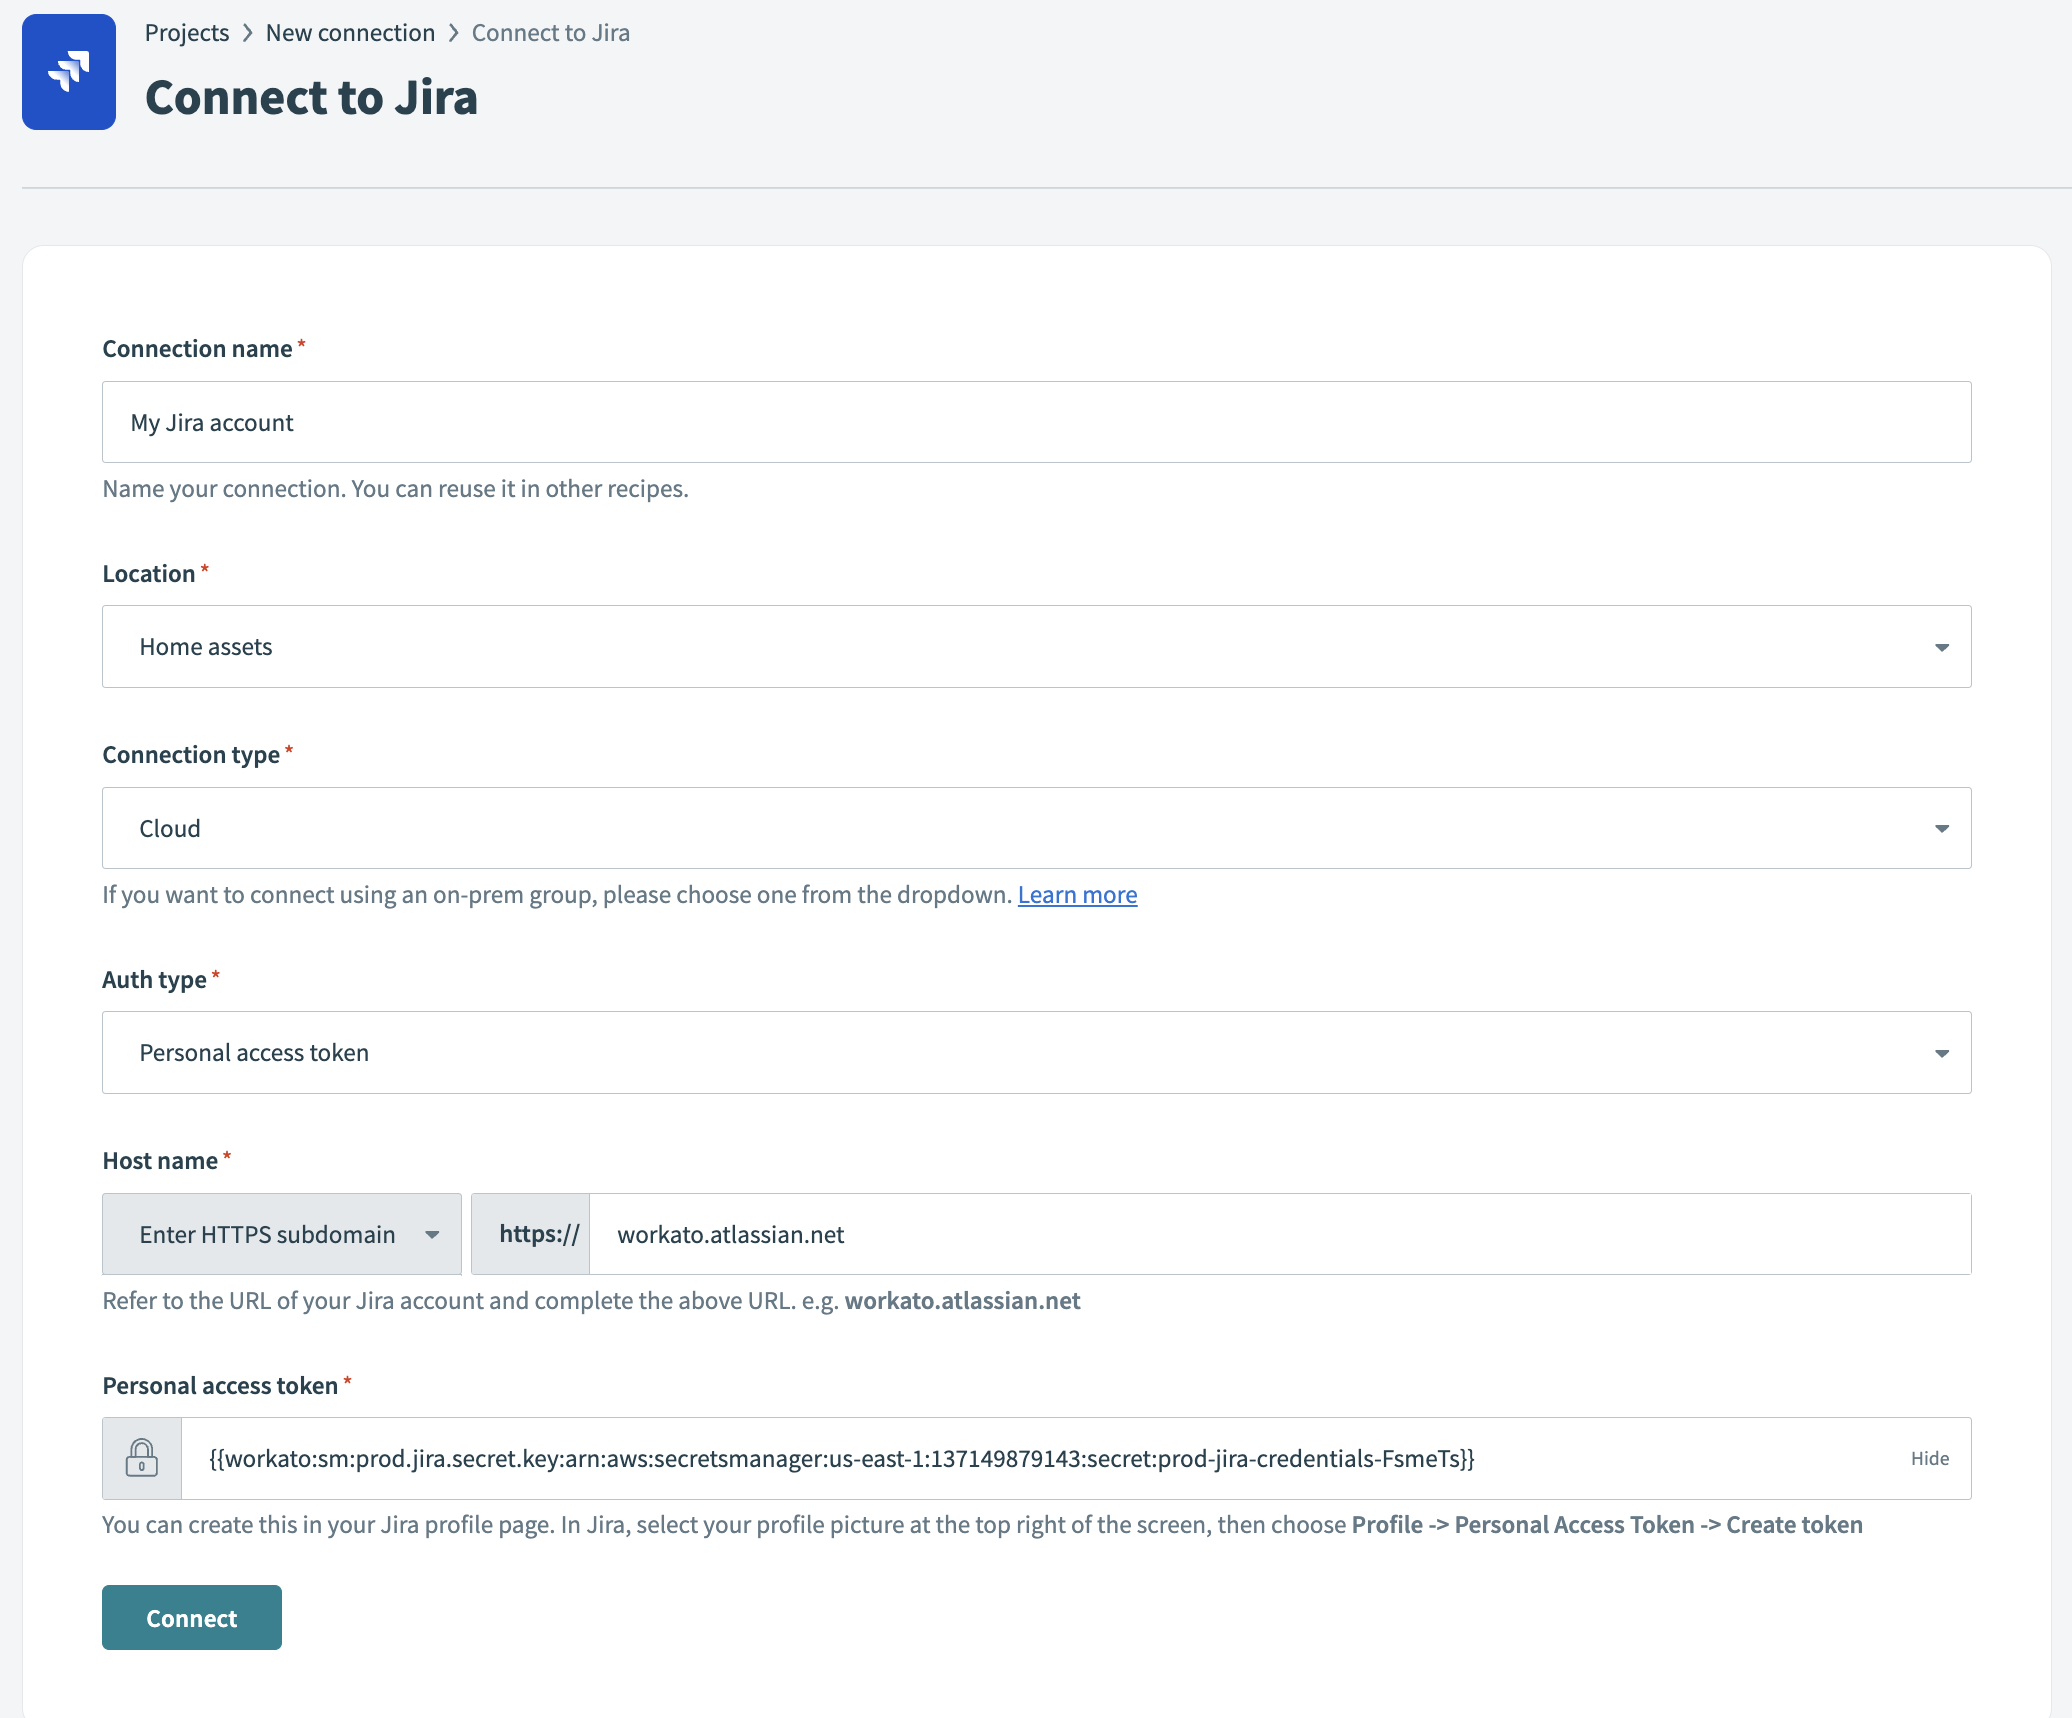
{{workato:sm:prod.jira.secret.key:arn:aws:secretsmanager:us-east-1:137149879143:secret:prod-jira-credentials-FsmeTs}}
In this example, prod.jira.secret.key is the key name in a secret named jira, and arn:aws:secretsmanager:us-east-1:137149879143:secret:prod-jira-credentials-FsmeTs is the secret ARN.
In the connection's configuration page, paste this entire value into the appropriate field. The following image shows a secret being used as the Custom Service client secret value in a Jira connection:

# Step 3: Complete your connection setup
Select Connect to authorize and complete your connection setup.
Last updated: 3/8/2024, 3:15:06 PM