# Google Sheets action - Add row
The Add row action allows you to add new rows to a selected sheet.
# How to use this action
# Setting up the Google sheet
First, in order for us to retrieve the custom data in a sheet, the sheet must contain at least one header line for the first row and one data line for the second row, as in the following screenshot.
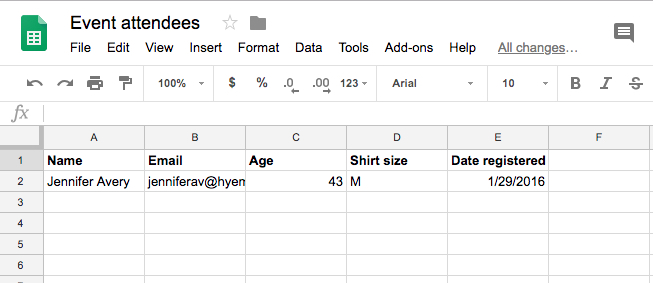 Sample Google sheet with 1 header row and 1 data rows
# Configuring the Add row action
To configure the action, we need to select the spreadsheet and the actual sheet to process.
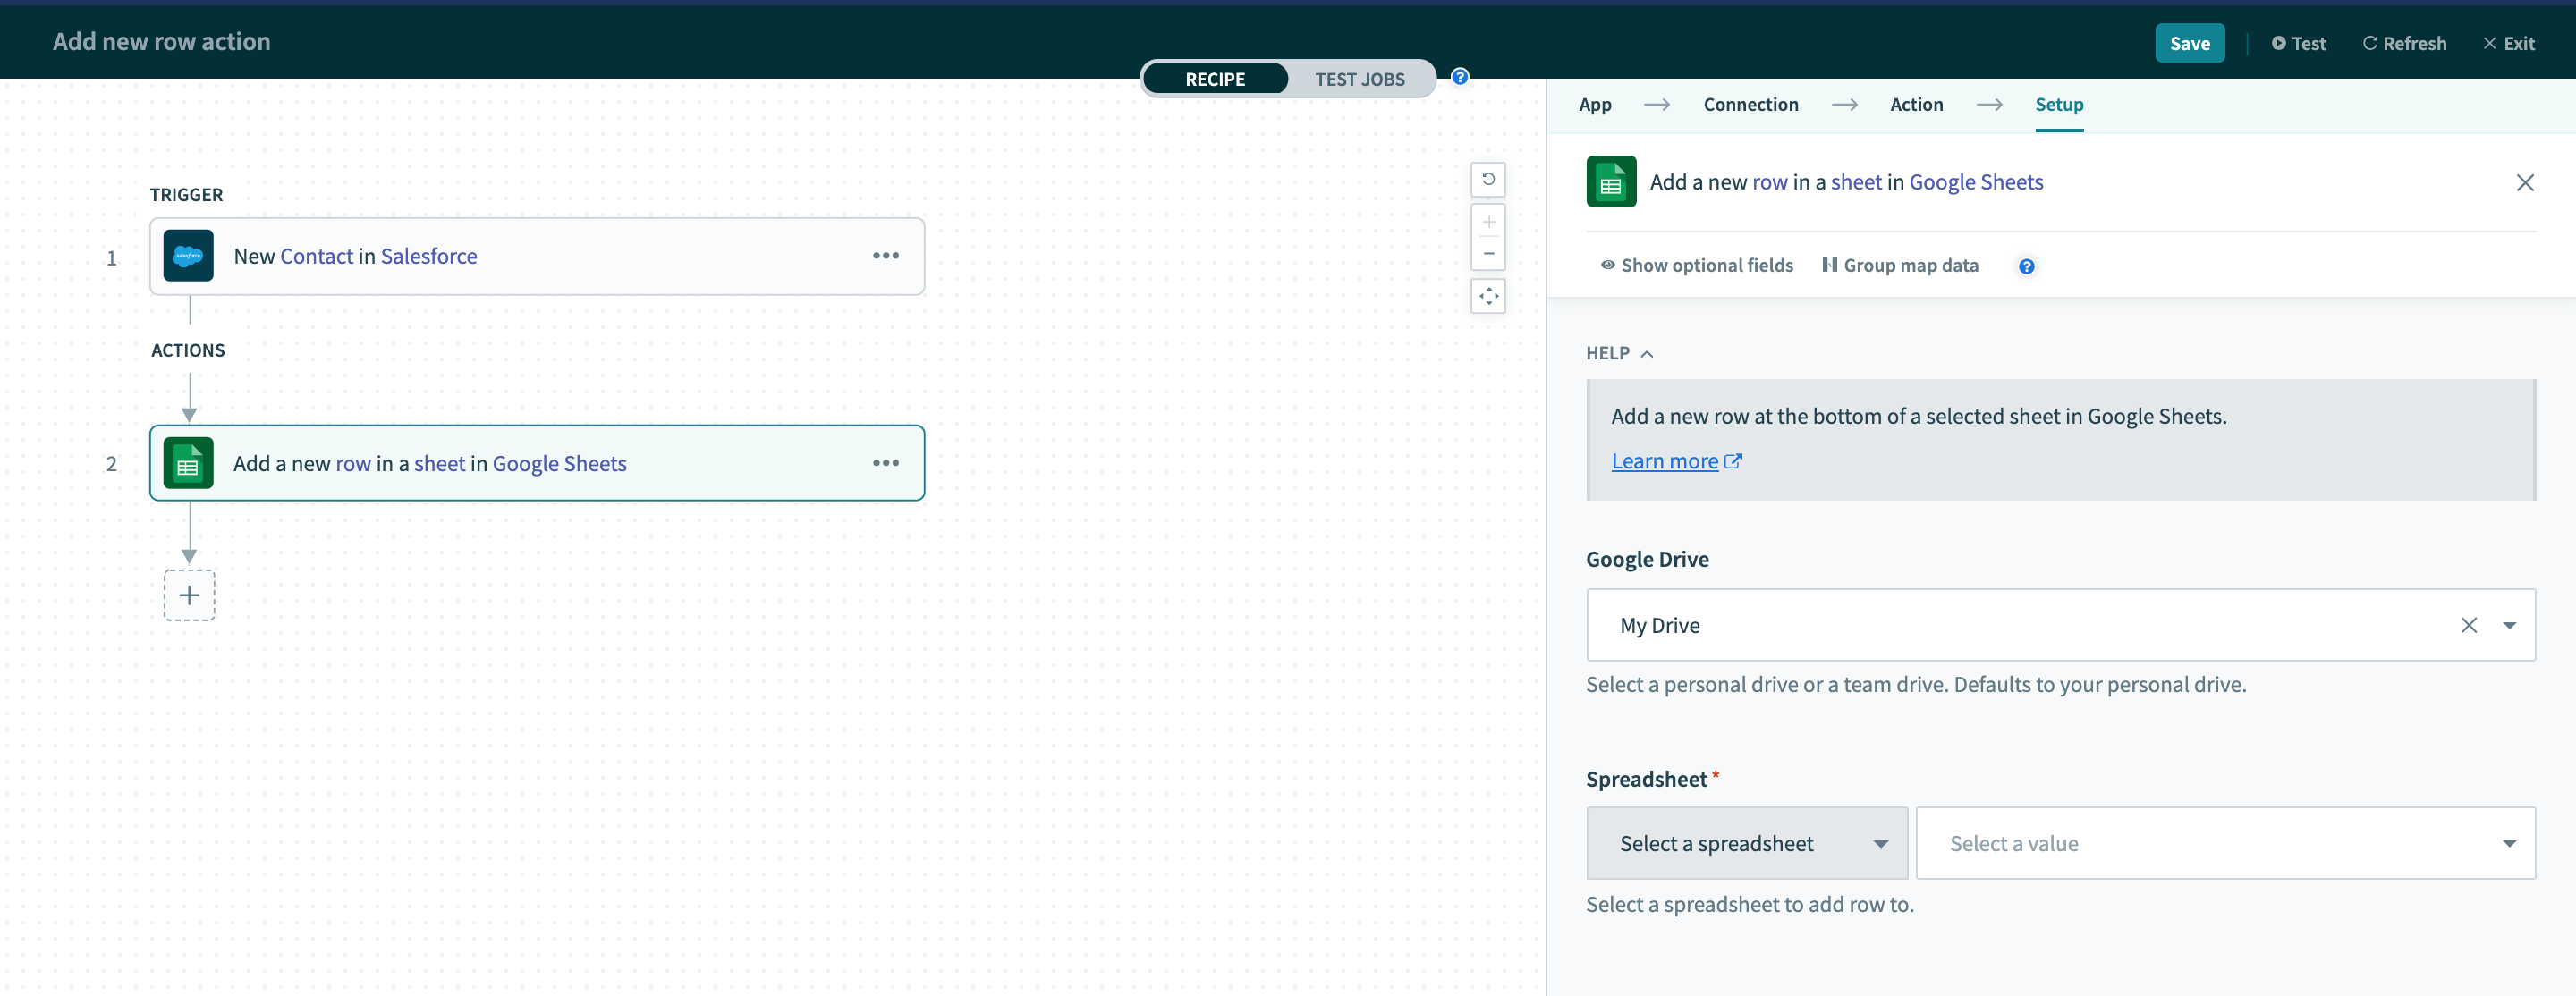 Use the add row action
Selecting a specific spreadsheet would generate your list of sheets within that spreadsheet, while selecting the sheet would generate your list of columns within that sheet.
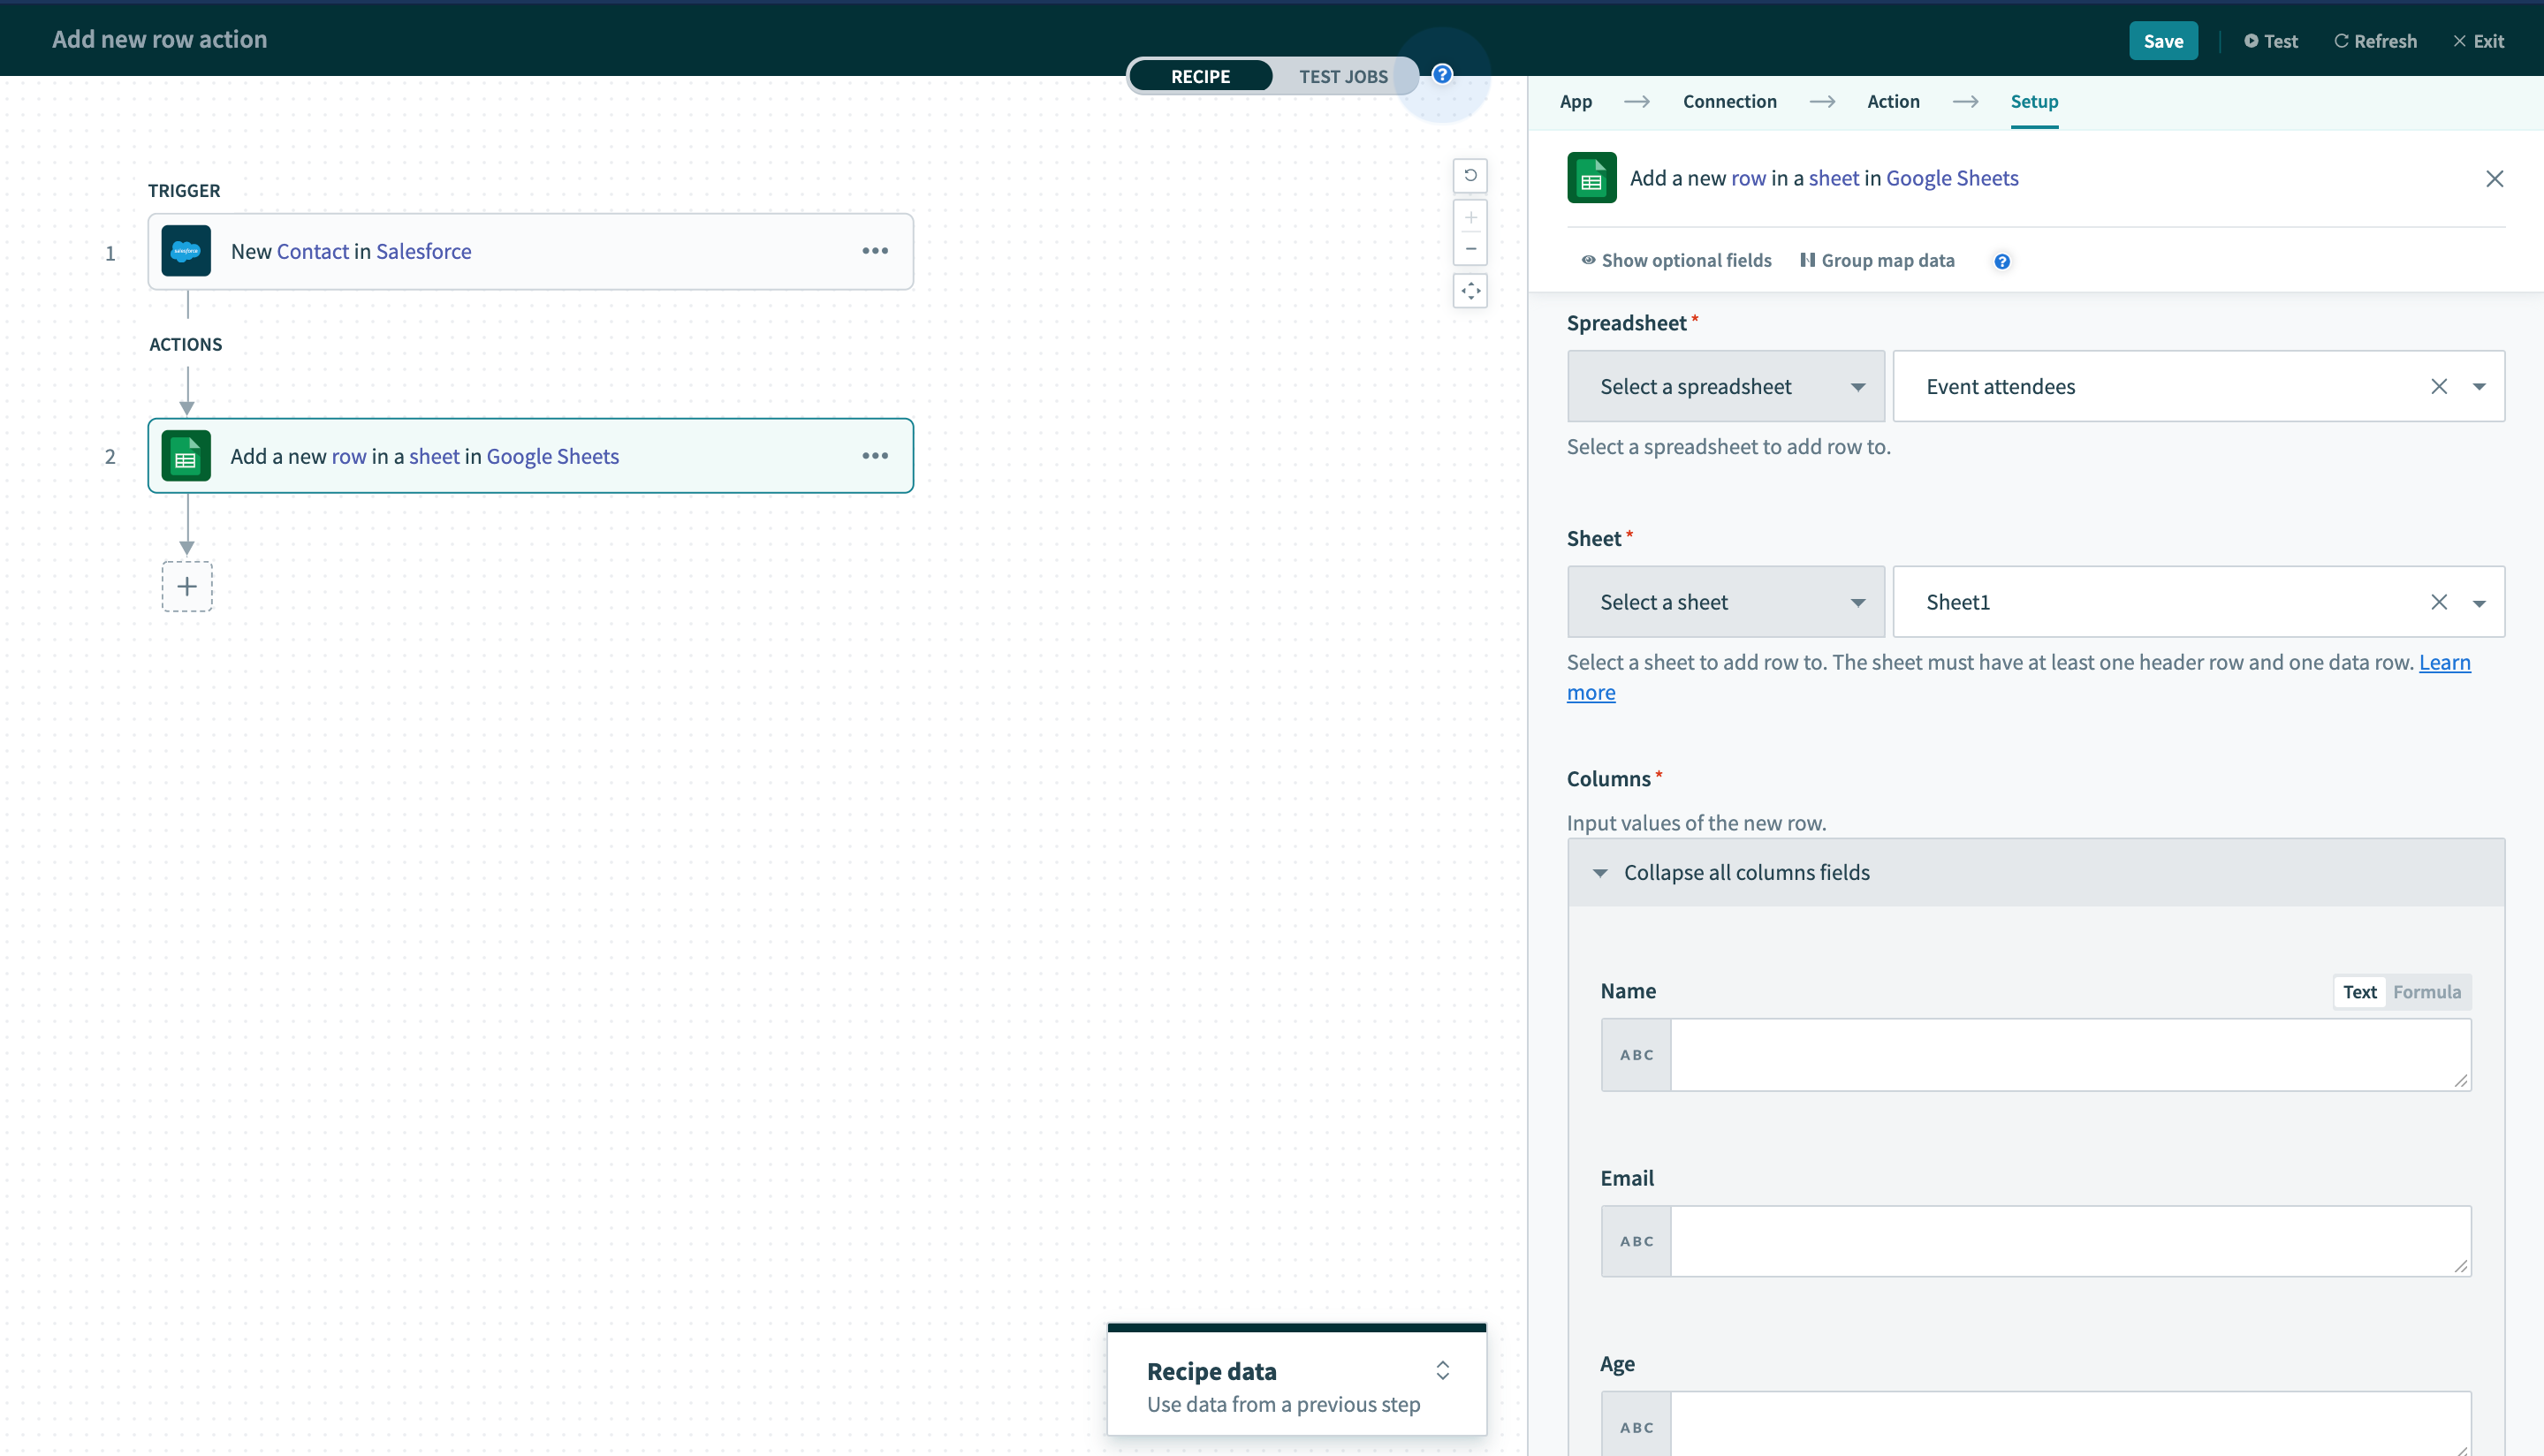 Configured row actions
# Example scenario
In this case, let's assume that we wish to move any new contacts created in Salesforce into a Google Sheet. The following shows the data mapping I've done to direct data coming in from Salesforce (as provided by the datatree on the right) to the matching fields in Google Sheets.
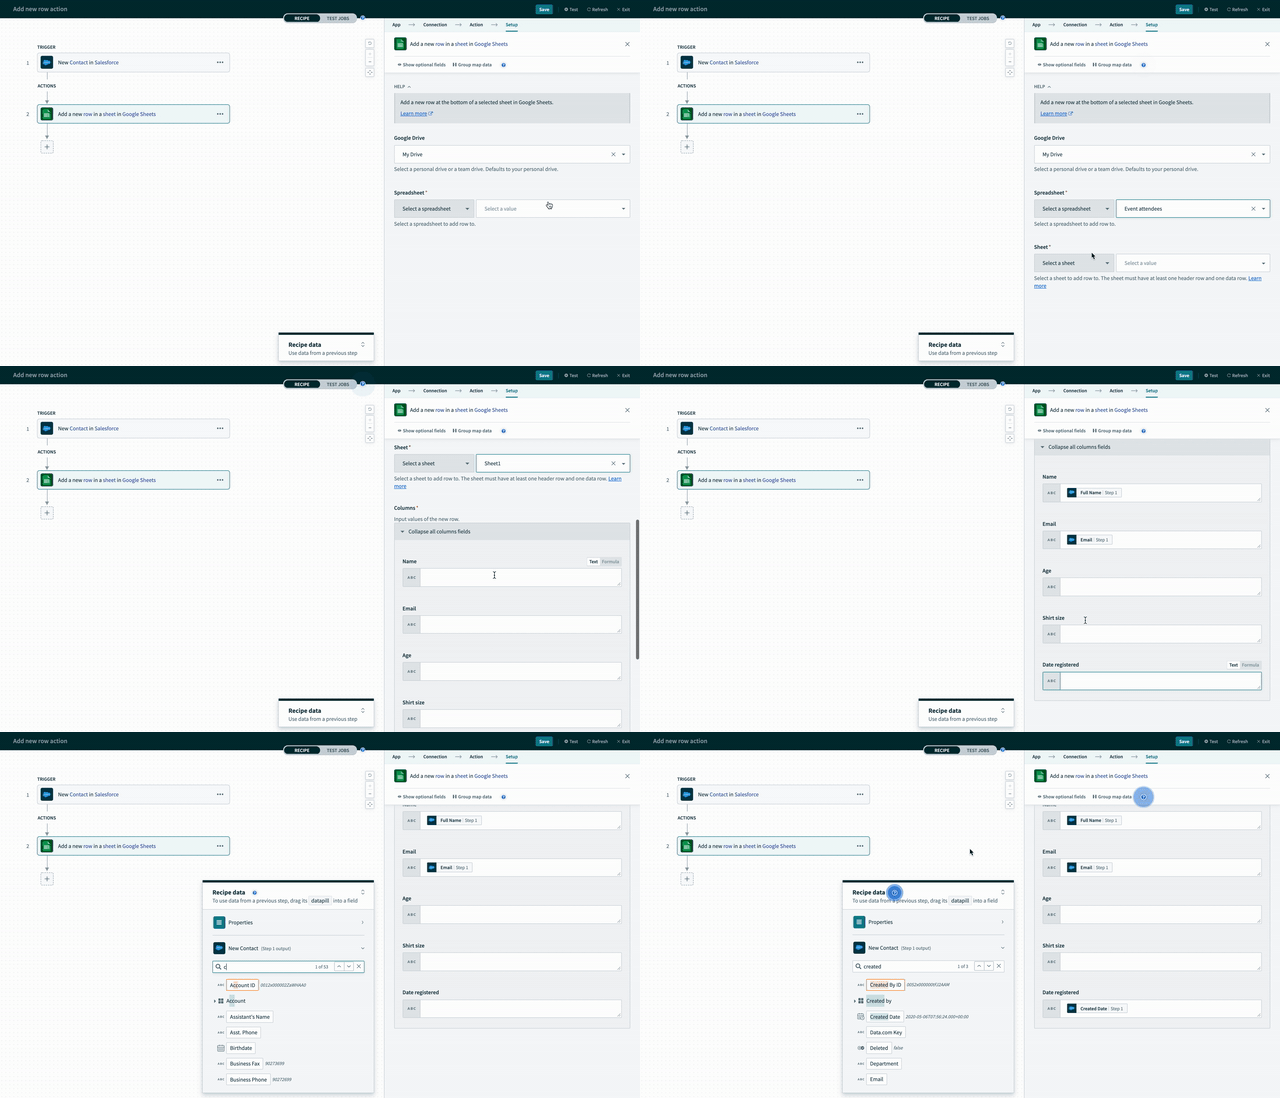 Available columns are derived from the selected Google sheet in the trigger
# Running the action
Now that we have the trigger and action configured, let's run our recipe!
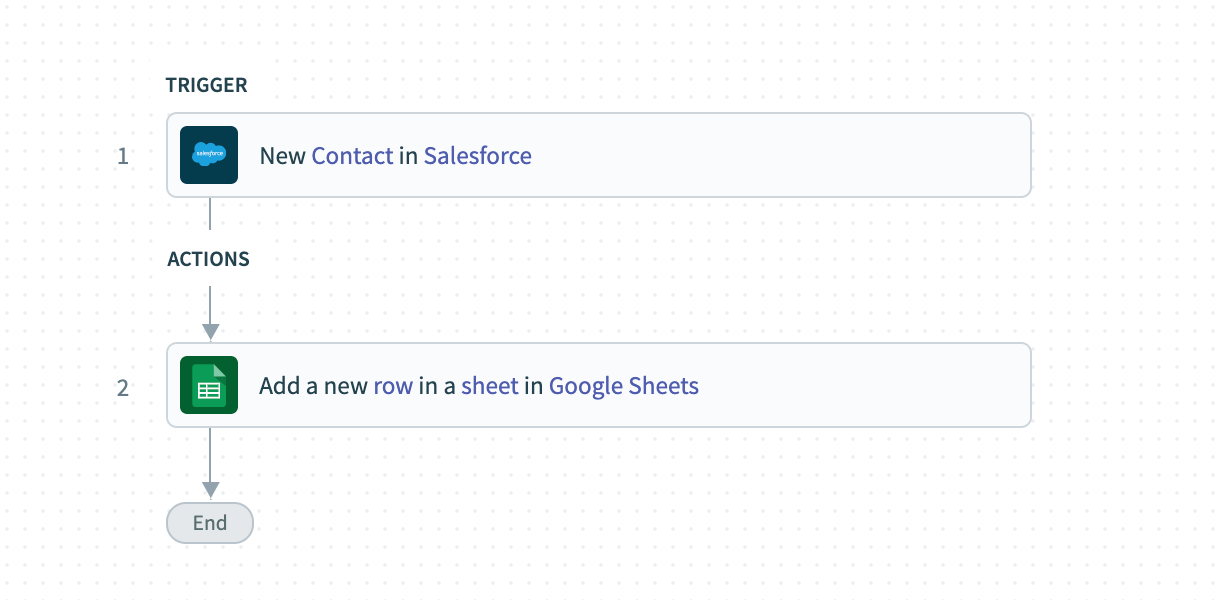 Configured recipe for testing
We'll take a quick look at the details of a specific job as follows, where we can see that a new contact, Anna Sharpay, was created in Salesforce. As we've mapped 'Name', 'Email' and 'Date created' in the recipe, we can see that these are the values passed to the Add row action in Step 1.
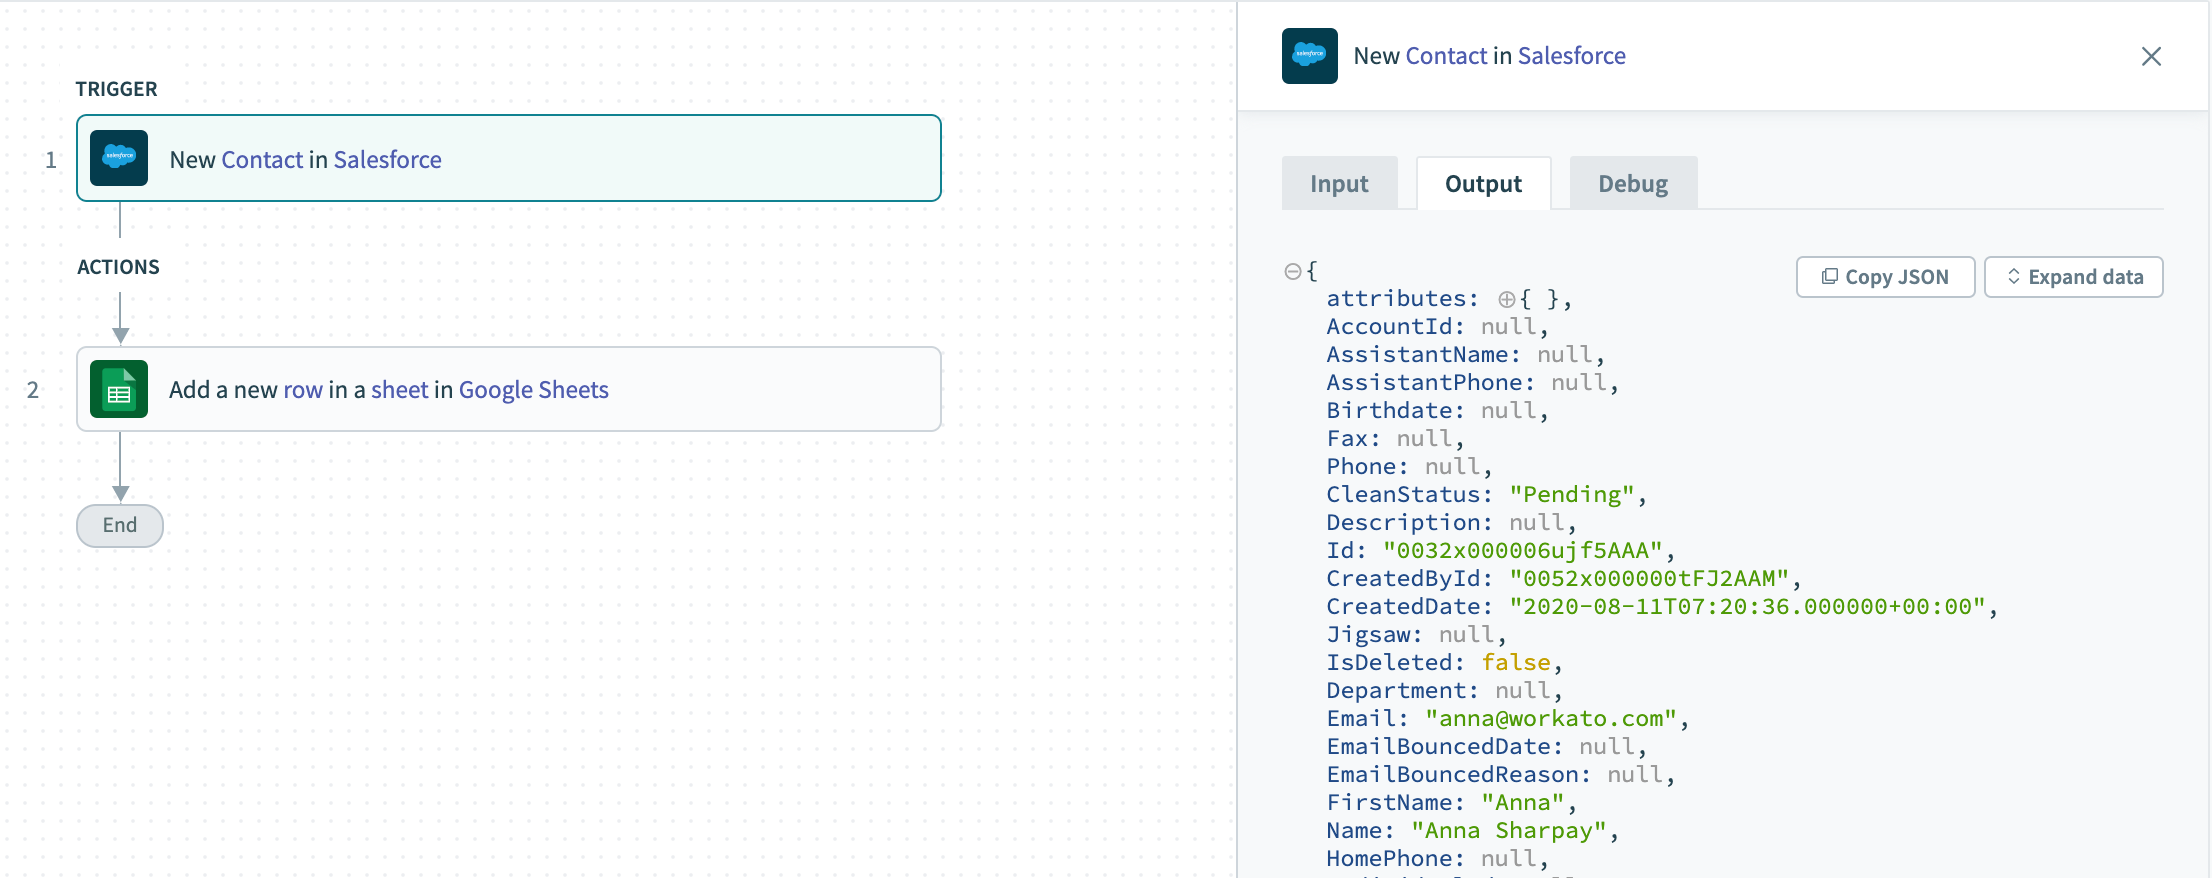 The trigger data received for a specific contact, as viewed in the job details page's output tab
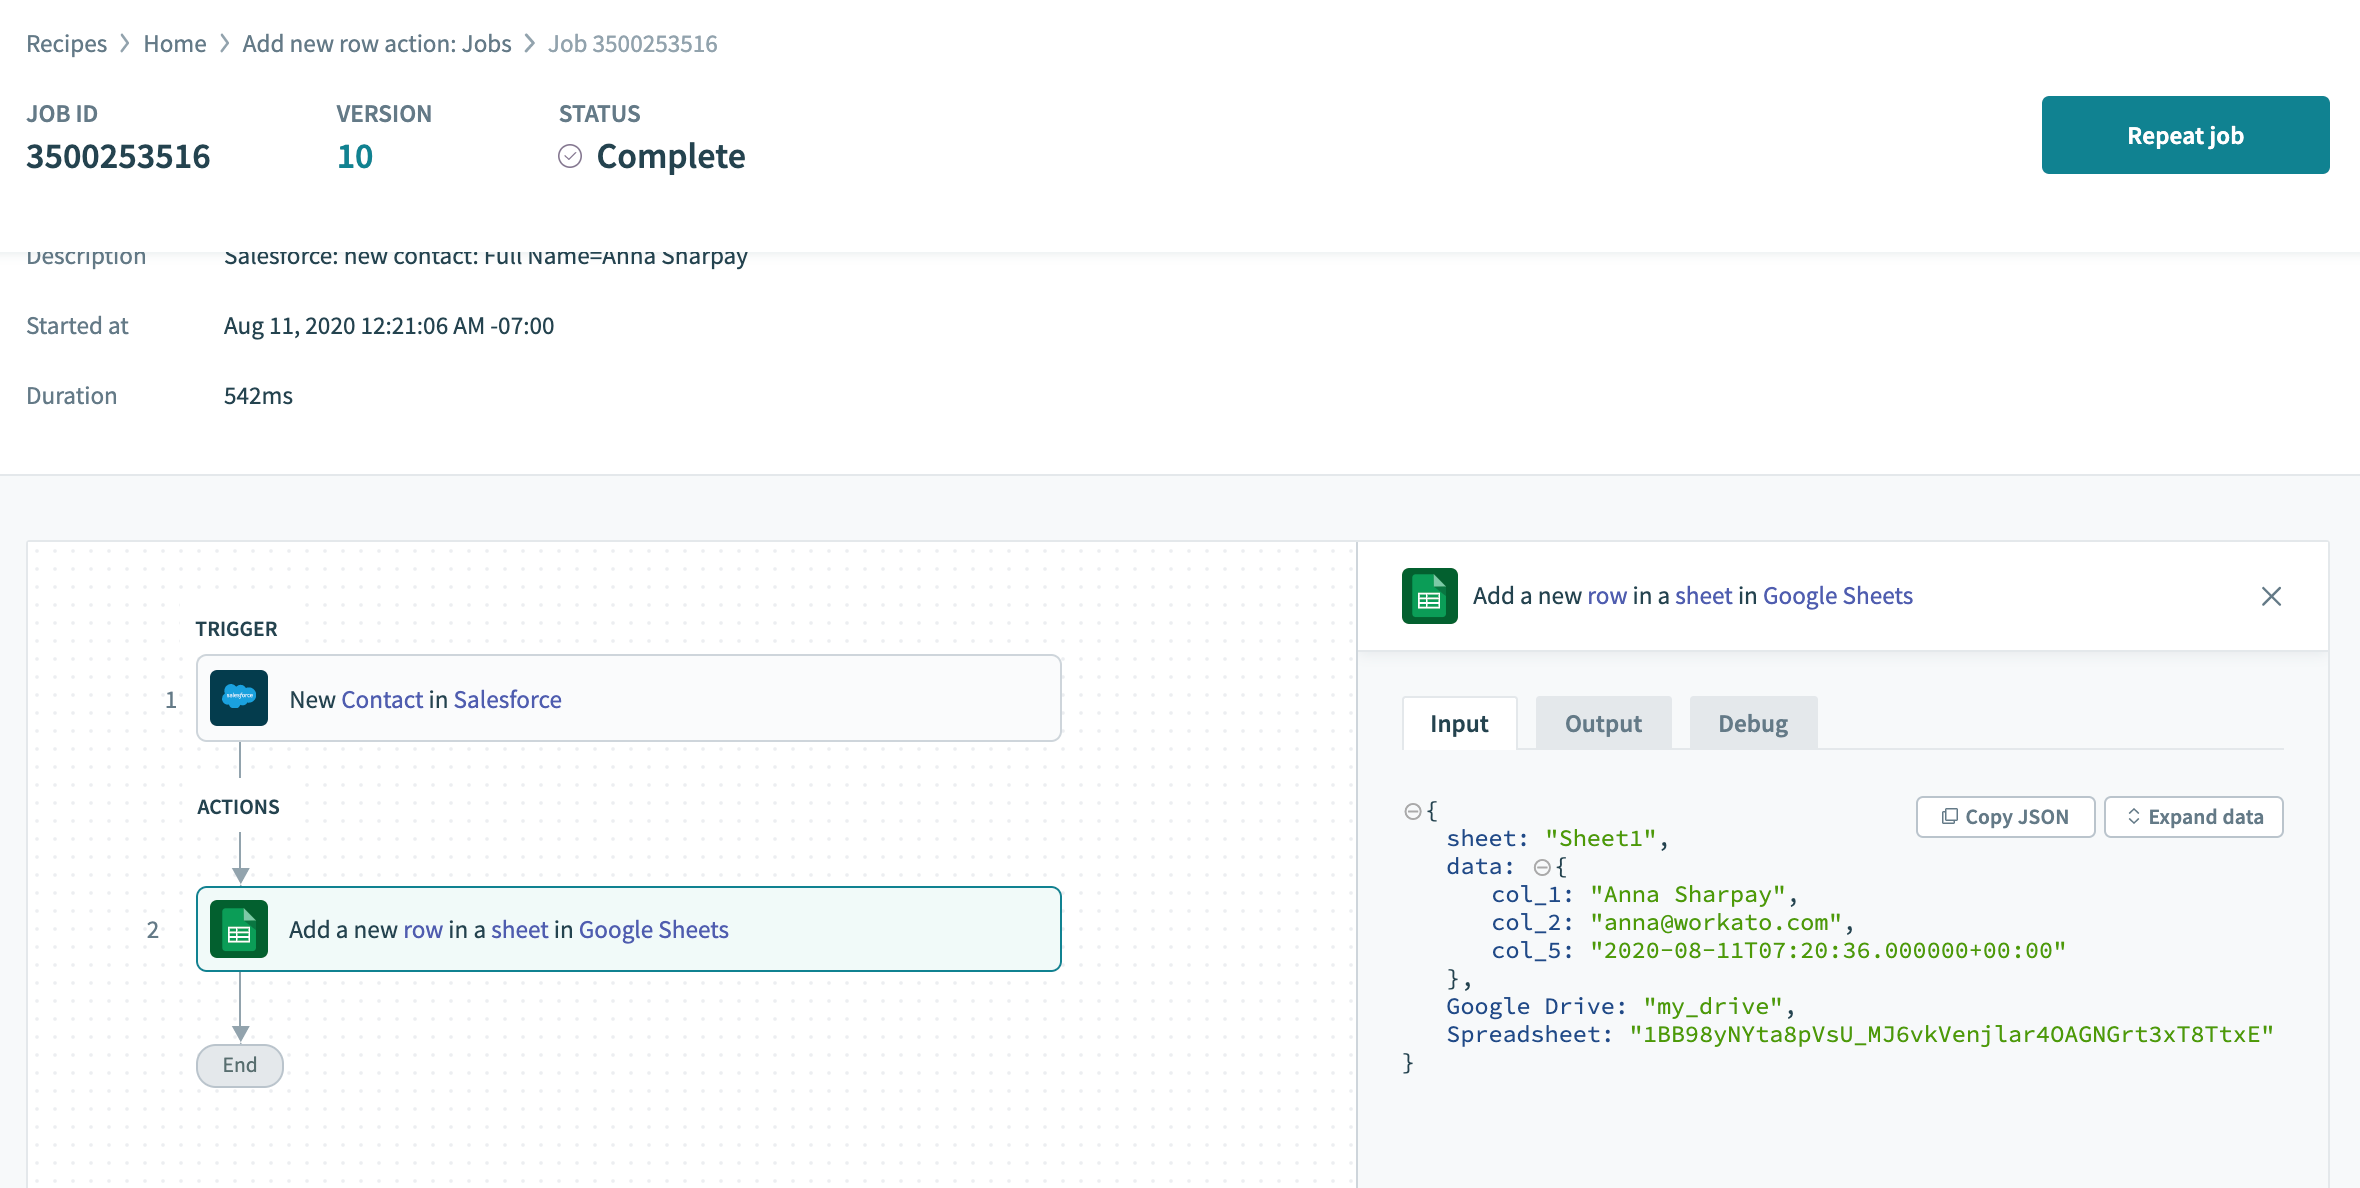 The data input into the create row action, as viewed from the job detail's page input tab
The output of the recipe, as viewed from our sheet, is below.
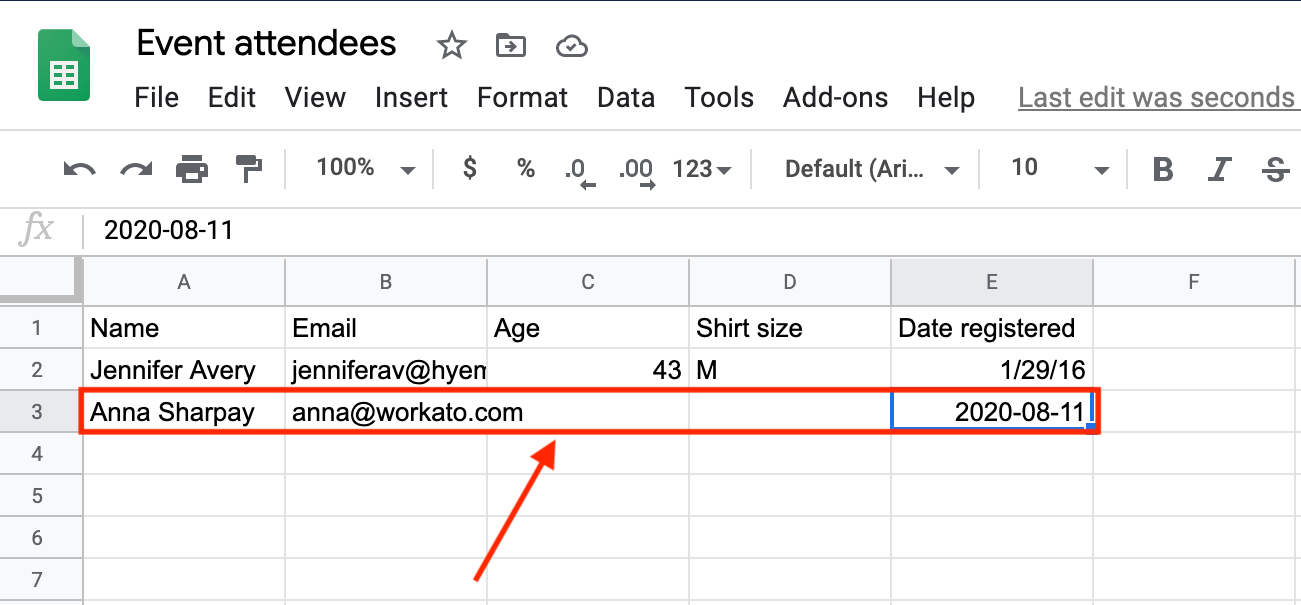 Edited sample sheet with added row
Last updated: 3/29/2023, 2:00:59 PM